This homemade Strawberry No Churn Ice Cream is rich, creamy, and bursting with natural strawberry flavor. Sweet and delicious, it’s the perfect refreshing dessert for a hot summer day. If you enjoy easy homemade treats and love ice cream, you’ll love this five ingredient recipe. And the best part? You don’t need an ice cream maker to make it.
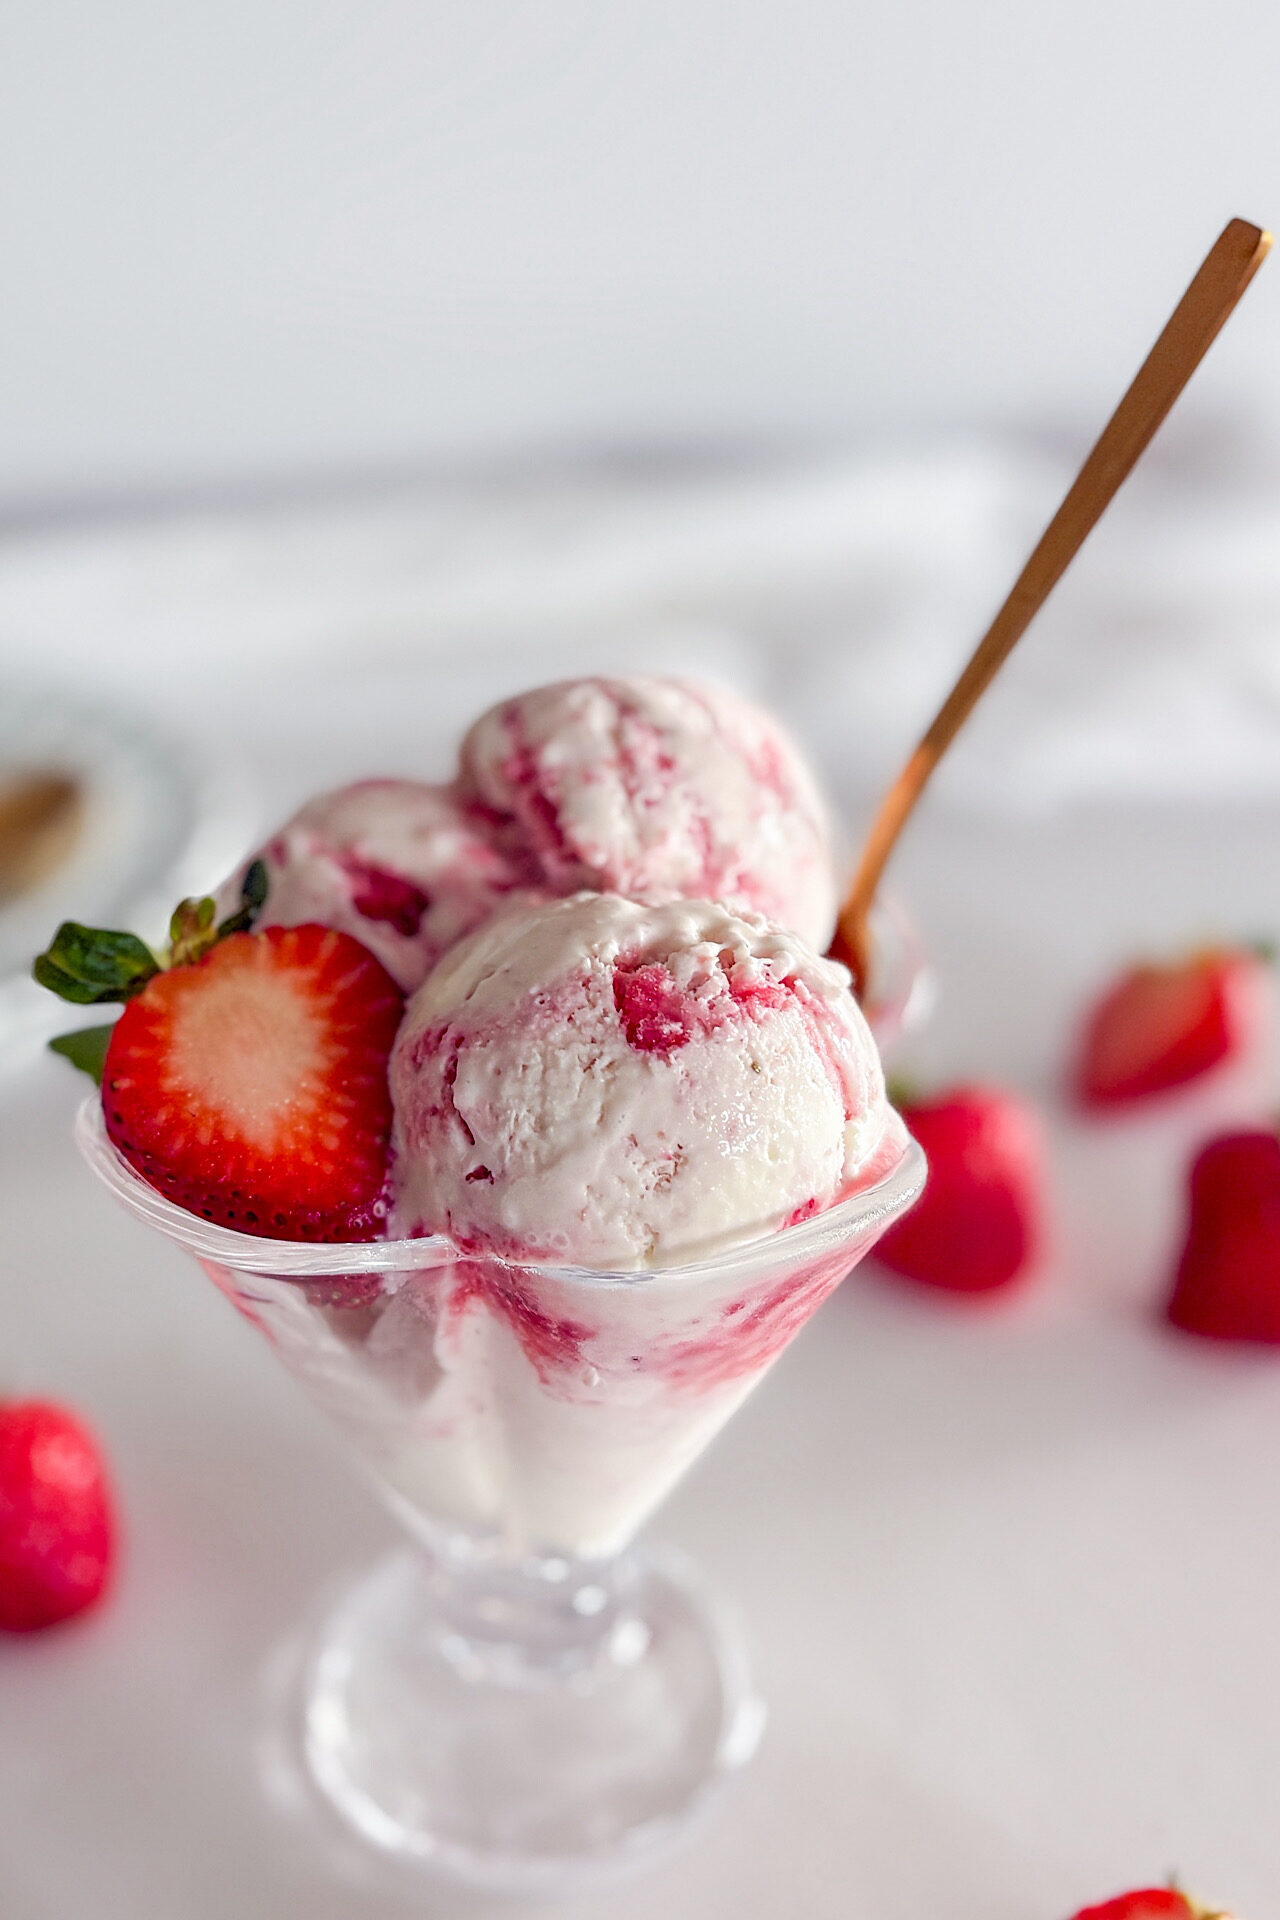
If you haven’t tried no-churn ice cream yet, you need to! It’s super creamy, not overly sweet, and unbelievably easy to make. All you need is sweetened condensed milk, whipping cream, and fresh ripe strawberries. Just whip the cream until stiff peaks form, fold it into the sweetened condensed milk, and you’re almost there. Stir in the strawberry purée and vanilla extract, and that’s it! You’ve got a homemade strawberry ice cream that’s perfect for summertime. Great for sharing with friends and family, and they’ll be so impressed you made it yourself without an ice cream maker!
PIN THIS RECIPE TO SAVE FOR LATER
This creamy, fruity ice cream is a twist on my favorite No Churn Pistachio Ice Cream recipe. And if you thought that one was tasty and creamy, just wait until you get a taste of this!
With just a few simple ingredients, this recipe might quickly become your go-to summer dessert (fingers crossed!). You can keep it simple and delicious, or, if you’re feeling adventurous, try some of the add-ins I’ve included. Enjoy the sweet strawberry ice cream for dessert by itself or alongside more strawberry-themed baked goods like this Easy Strawberry Cake.
Give my Strawberry No-Churn Ice Cream recipe a try—I’ve been making it on repeat lately, and I think you’ll love it too! Plus, July is National Ice Cream Month, so what better way to celebrate than with a sweet, homemade scoop of strawberry ice cream?

WHAT DOES NO CHURN ICE CREAM MEAN?
No-churn ice cream is the easiest way to make homemade ice cream; no fancy machine or cooking is required. You simply whip some whipping cream, fold it together with sweetened condensed milk, add your flavoring, freeze it, and you’re done. It takes just a few minutes to prepare. It’s incredibly easy, and the result is a rich, creamy texture. While it may not be exactly like high-end ice cream, it’s much easier to make and a delicious homemade substitute.
WHY YOU’LL LOVE IT STRAWBERRY NO CHURN ICE CREAM
✔️ No Ice Cream Maker Required – This no-churn ice cream recipe doesn’t require any special equipment like an ice cream maker.
✔️ No cooking involved – You don’t have to cook anything! Just mix up rich, creamy strawberry ice cream in minutes.
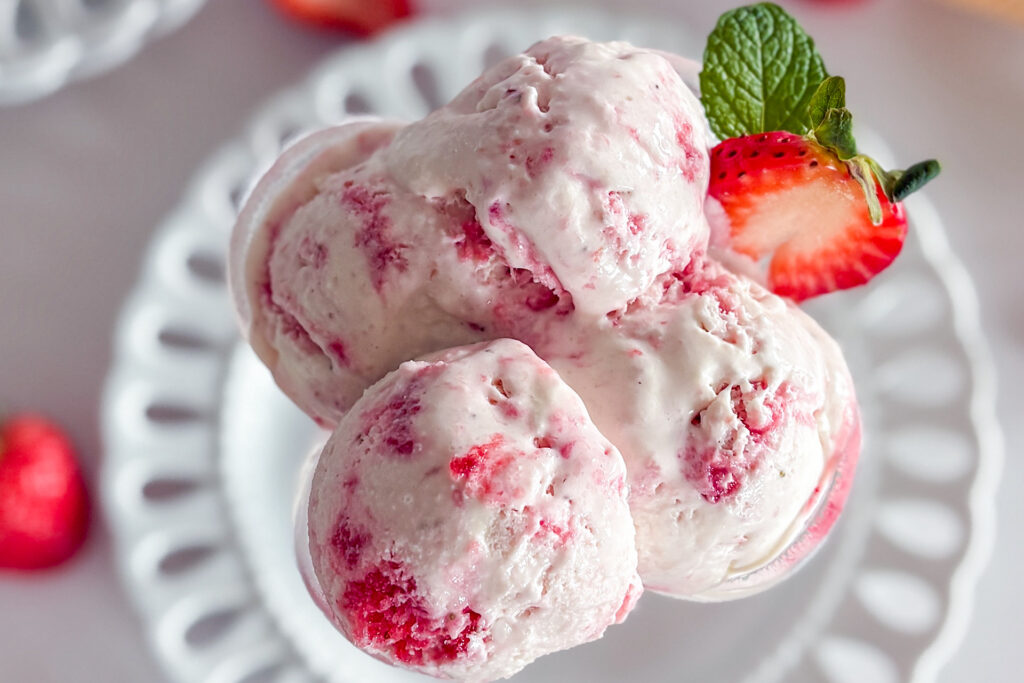
✔️ Deliciously Thick and Scoopable – Rich and creamy with a thick, scoopable consistency.
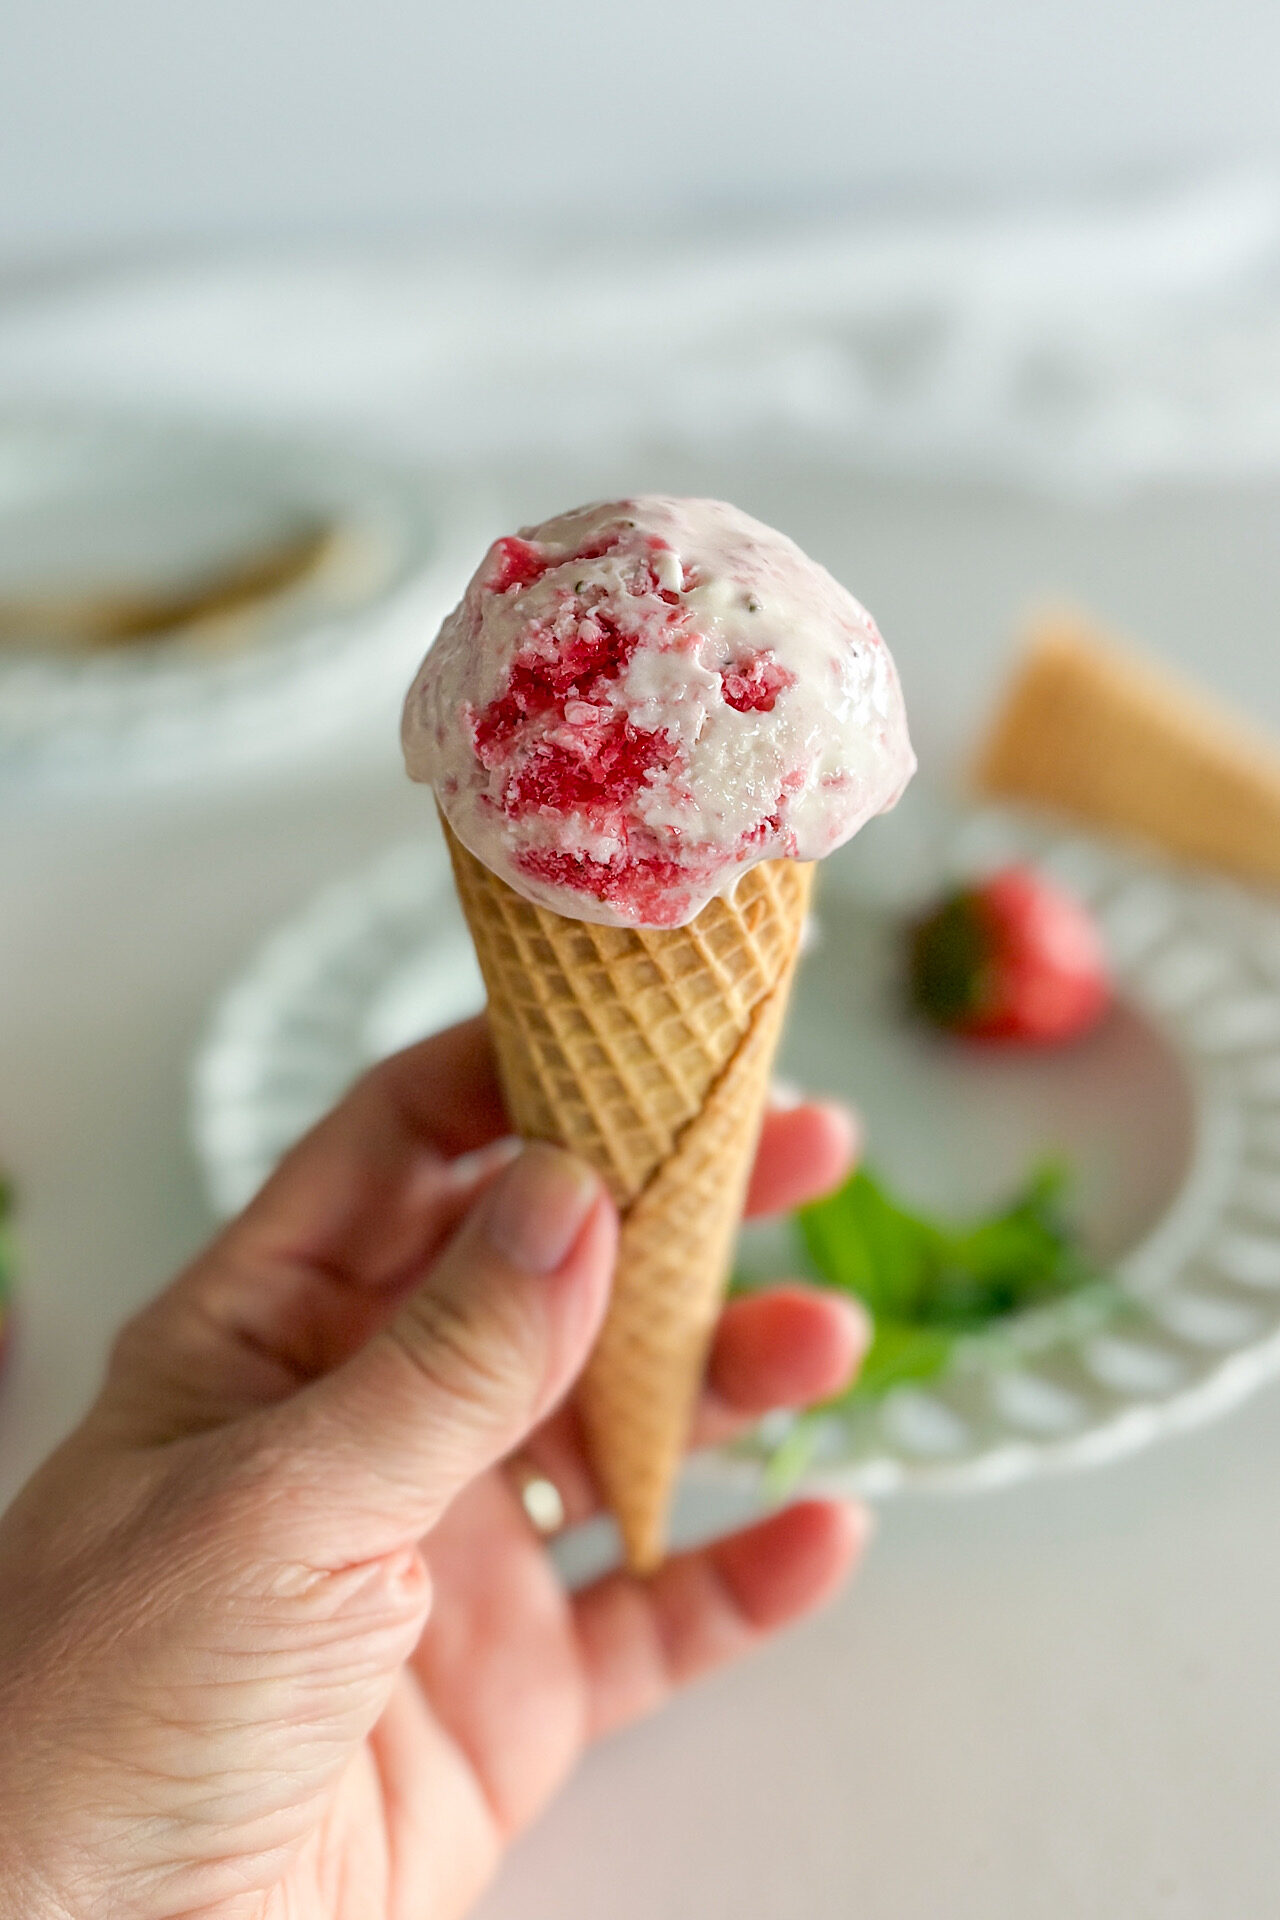
✔️ So many ways to enjoy – It’s delicious all on its own, but even better topped on a warm Blueberry Tart or served with Rhubarb Strawberry Sauce. Serve it in a sugar cone or dig right in from the container!
INGREDIENTS
Full ingredients, quantities, and instructions are in the printable recipe card at the end of this post. Read through this section for all the ingredient substitutions and tips!
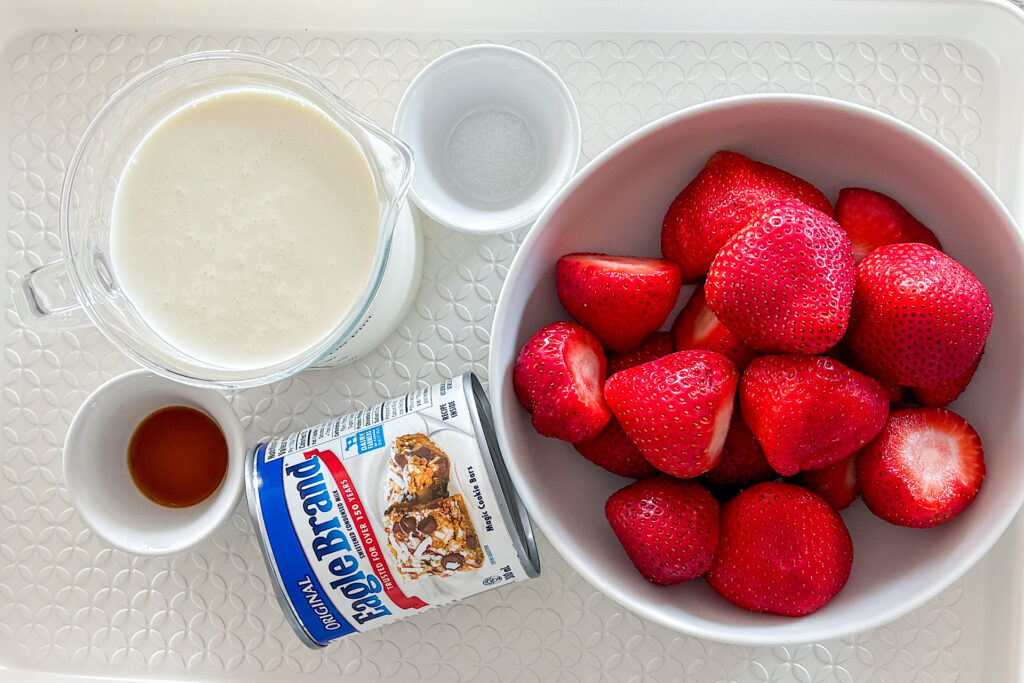
- Strawberries—In-season sweet strawberries are, of course, the best option; however, you can also use frozen berries; just thaw them in advance and drain any excess liquid.
- Heavy Whipping Cream—Use full-fat whipping cream for a creamy flavor and consistency, and make sure your whipping cream is very cold before you start.
- Canned Sweetened Condensed Milk—Adds sweetness, gives the ice cream a really creamy texture, and also creates a consistency that doesn’t get too solid once frozen, making it perfectly scooppable and ideal for no-churn ice cream. This recipe has not been tested with low-fat condensed milk. Make sure to add the full 14 ounces.
- Pure Vanilla Extract—Vanilla extract perfectly enhances the strawberry flavor.
- Salt—Salt helps to balance out the sweetness and enhances the overall strawberry flavor.
Food coloring—Optional. I didn’t use any in this recipe, but if you prefer a more vibrant pink hue, you can add a couple of drops of red liquid food coloring to the ice cream.
HOW TO MAKE STRAWBERRY NO CHURN ICE CREAM
This recipe isn’t complicated, but there are a few steps involved. Be sure to check the detailed, printable recipe card at the bottom of the page for exact measurements and full instructions.
Start by blending your strawberries in a blender or food processor until smooth, with some lumps for texture. If you want your ice cream extra smooth, you can strain the purée, but that part’s totally optional. Next, grab your stand mixer and whisk the cold whipping cream on high speed until stiff peaks form. It should take about 3 minutes.

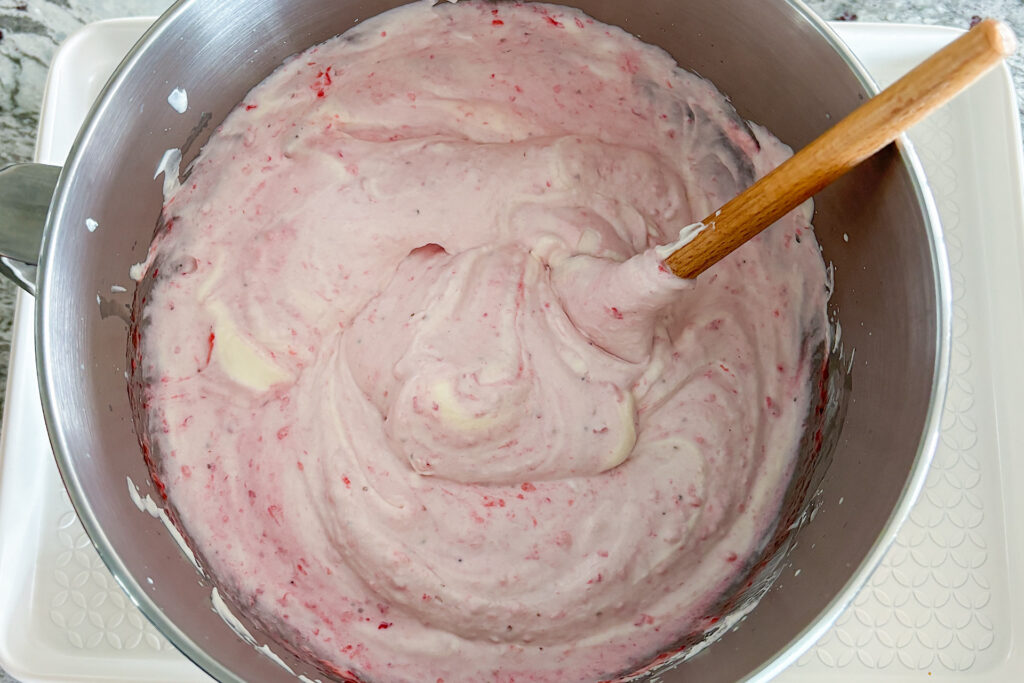
Now comes the fun part: gently fold in the sweetened condensed milk, a splash of vanilla, and salt using a rubber spatula. Mix it all together until it’s just combined.
Before mixing everything, set aside about 6 tablespoons of the strawberry purée for later. Add the rest of the purée to the whipped cream and condensed milk mixture and gently fold it in, leaving some streaks for a marbled effect.

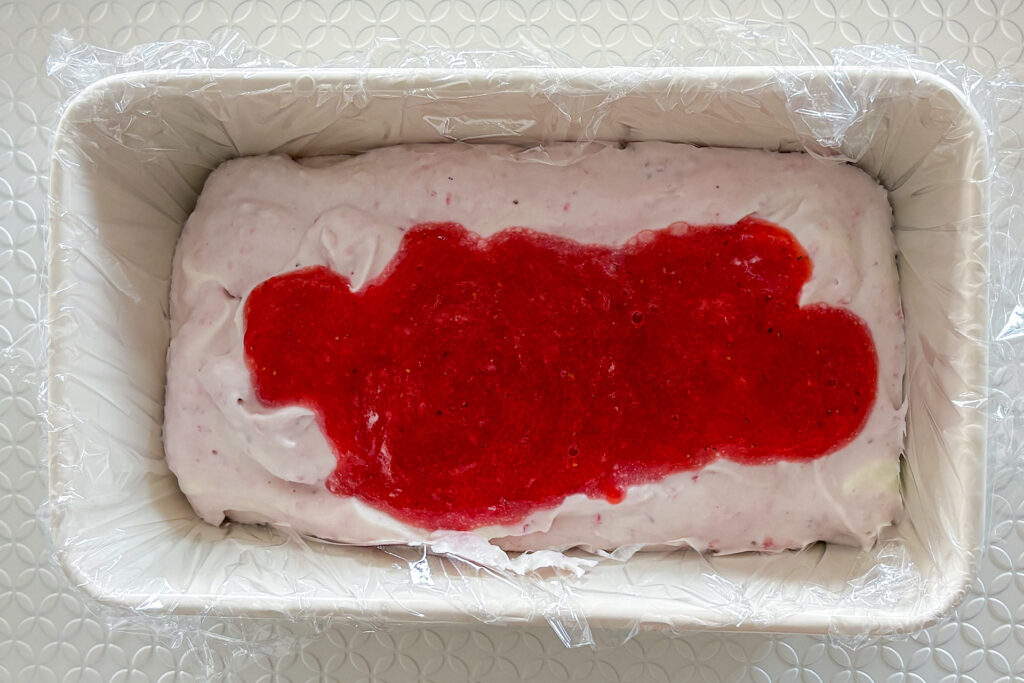
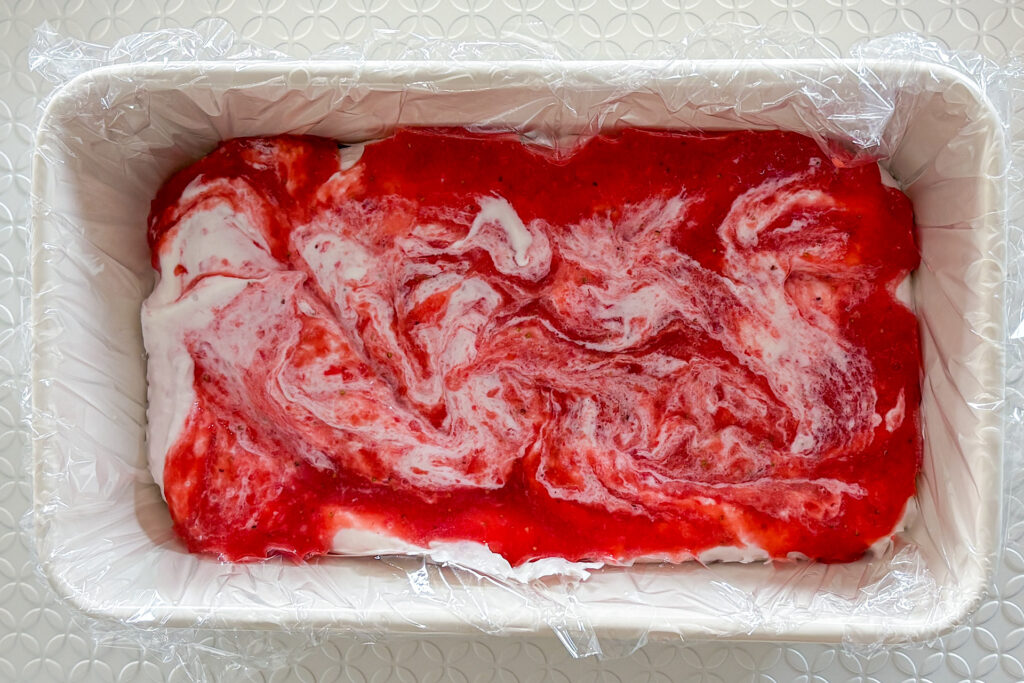
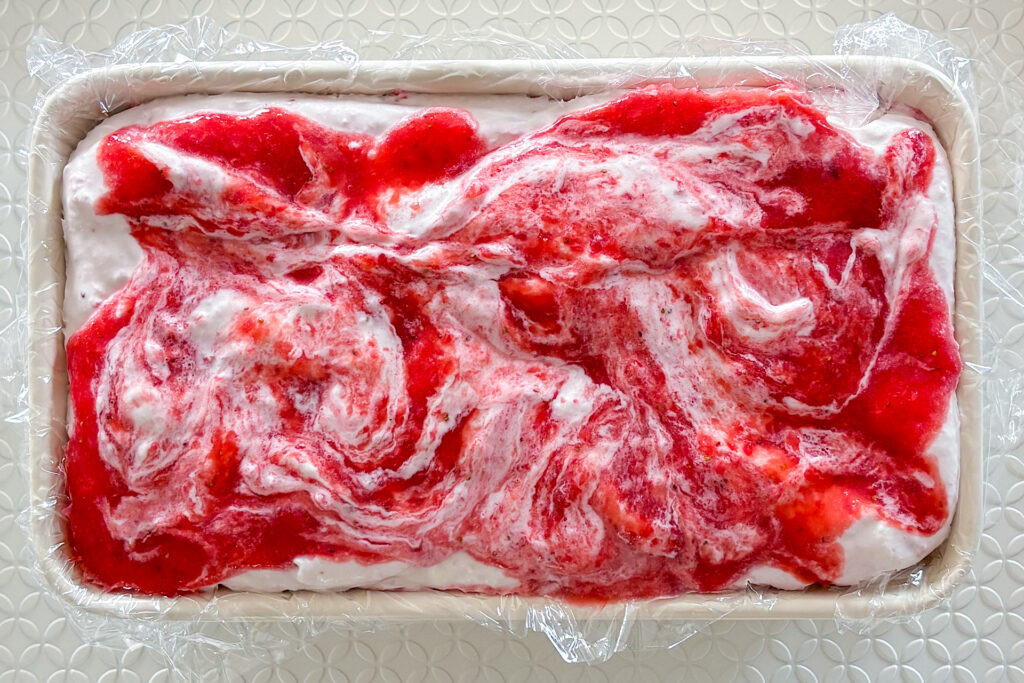
Pour half of the ice cream mixture into a 9×5 freezer-safe container. Then, spoon about 3 tablespoons of the reserved purée over the top, and gently swirl with a spoon.

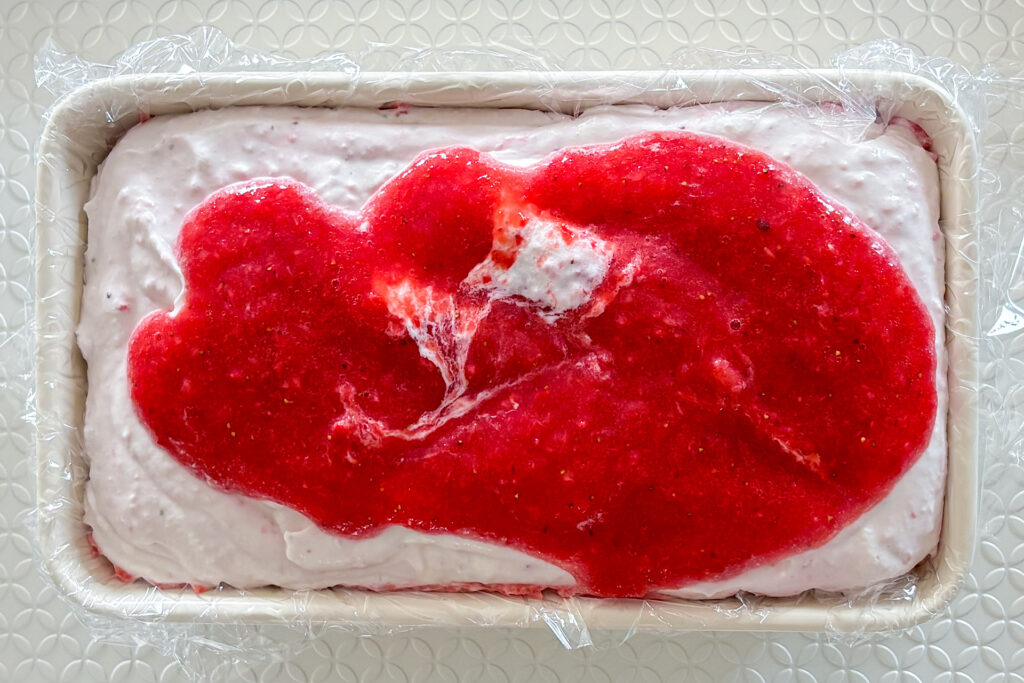
Add the remaining ice cream mixture, drizzle the rest of the strawberry purée on top, and use a spatula to spread and create a swirl design.
Cover it with plastic wrap, then pop it in the freezer for at least 6 hours, or overnight. When you’re ready to serve, let the ice cream sit out for about 15 minutes to soften a bit, then scoop it up and enjoy!
Equipment—No ice cream maker needed for this no-churn strawberry ice cream! Just a blender or food processor to purée the strawberries, an electric mixer to whip the cream, and a container to freeze it in.
OPTIONAL ADD-INS
- Swirl in dark chocolate chips for a little added crunch, or add shaved chocolate to top the ice cream.
- You can experiment with herbs, such as mint or fresh thyme.
- You could also add strawberry extract for even more strawberry flavor.
Also, this recipe is very easy to adapt. You can try raspberries or blueberries too. They’re just as tasty and perfect for summer!
STORAGE TIPS
Freeze—For best results, press a layer of plastic wrap or parchment paper directly onto the surface of the ice cream before sealing with a lid to minimize air exposure. Store the strawberry no-churn ice cream in an airtight container in the freezer section for up to 2 weeks. Just keep in mind it will be rock solid once you take it out of the freezer. So let it thaw at room temperature for about 15 minutes, or until it starts to soften.
Once you scoop out a serving of ice cream, return the rest to the freezer right away. Don’t leave it out longer than necessary—if it melts and refreezes, it can become icy instead of staying creamy.
MORE DELICIOUS DESSERT RECIPES
- Orange Chocolate Bundt Cake
- Almond Sand Dollar Cookies
- Cashew Date Truffles
- Chocolate Crinkle Cookies
- Double Chocolate Banana Bread
Did you make this recipe? Leave a ⭐️⭐️ ⭐️ ⭐️ ⭐️ review and share it on Facebook, | Pinterest, | Instagram.
Nutritional information is automatically calculated, so should only be considered as an estimate. The accuracy of the nutritional information for any recipe on this site is not guaranteed.
STRAWBERRY NO CHURN ICE CREAM
Equipment
- Blender or Food Processor
- Electric Stand Mixer or Hand Mixer
- Measuring cups and spoons
- Rubber spatula
- Loaf pan or an airtight freezer-safe container 9 x 5
Ingredients
- 2 cups cold whipping cream (35% fat)
- 1 (14-ounces) canned sweetened condensed milk
- 1 lb fresh strawberries (about 500g) stems removed and sliced
- 2 teaspoon pure vanilla extract
- 1/4 teaspoon sea salt
Instructions
- Blend the strawberries: Add the strawberries to a blender or food processor and pulse until you reach your desired texture—smooth or slightly chunky. For a smoother finish, you can strain the purée through a sieve to remove the seeds. If you like bits of fruit in your ice cream, reserve some chopped strawberries to stir in later.
- Whip the cream: In the bowl of a stand mixer fitted with the whisk attachment, beat the cold whipping cream on high speed until stiff peaks form, about 3 minutes.
- Mix the base: Using a rubber spatula, gently fold in the sweetened condensed milk, vanilla extract, and a pinch of salt. Mix just until combined; avoid overmixing.
- Fold it together: Before mixing everything, set aside about 6 tablespoons of the strawberry purée for layering.Add the remaining strawberry purée to the whipped cream and condensed milk mixture. Gently fold it in, leaving some streaks for a marbled effect.
- Layer and swirl: Pour half of the ice cream mixture into a 9×5 freezer-safe container (I like to use a loaf pan lined with parchment paper or plastic wrap). Spoon 3 tablespoons of the reserved strawberry purée over the top and swirl gently with a spoon or spatula. Add the remaining ice cream mixture, then top with the rest of the reserved strawberry purée. Use a spoon or spatula to spread it out and create a swirl design.
- Freeze: Cover securely with plastic wrap or a fitted lid, and freeze until firm, at least 6 hours, or overnight for the best texture.
- Serve and enjoy: When ready to serve, remove the ice cream from the freezer and let it sit at room temperature for about 15 minutes so it's easier to scoop and serve. Enjoy!
This looks so good! What a great combination of flavors!
Thanks so much Suzanne! It really is such a refreshing and delicious flavor pairing!